 Slic3r Manual
 Slic3r Manual
The Printer Settings will be updated the least, unless Slic3r is going to be used for many printers, for example, in a 3D printer farm.
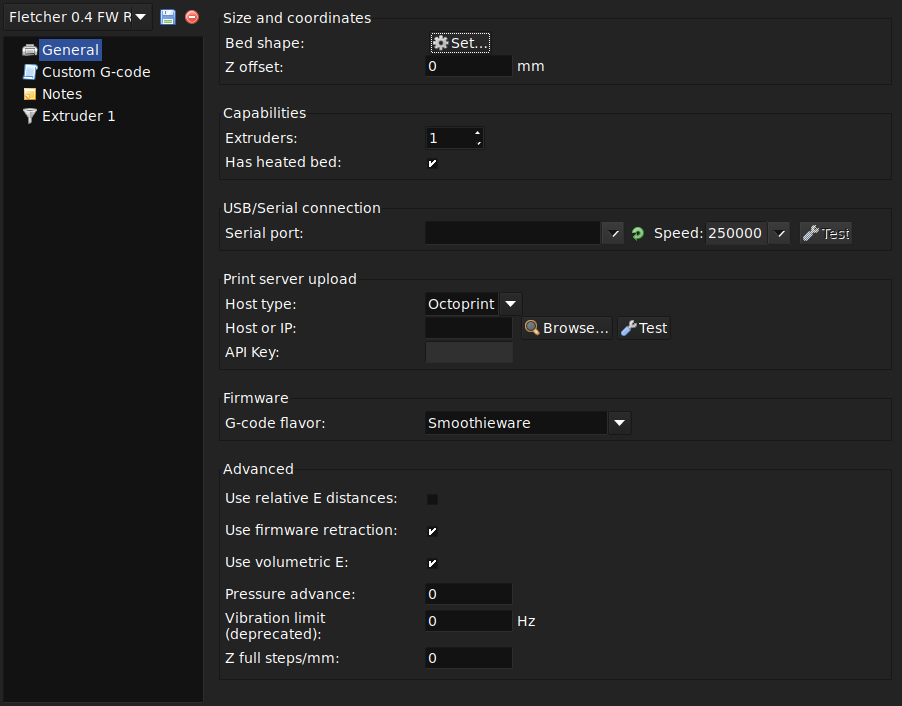
Printer Settings: General
The Bed size setting is taken from the wizard (see p.) and is only used for previewing the model in the plater.
The Print center is the point around which the print will be centered. A Bed size of 200mmx200mm and a Print center of 100mmx100mm would sit the print in the middle. Should it be desired to print away from the center, because of a scratch in the glass perhaps, then this option should be used.
Z offset can be used to compensate for an incorrectly calibrated Z end-stop. If the nozzle stops slightly too far from the bed, then adding a negative value will offset all layers by that amount. The correct solution however is to fix the end-stop itself.
The optimal Z endstop position is where the nozzle tip barely touches the surface of the bed when homed. A sheet of paper makes a good gauge for this very small distance. It is not recommended to use this setting to try and improve layer adhesion, by "squashing" the bottom layer into the bed, instead look at the suggestions in section .
As selected in the wizard (see p.), G-code flavour defines the dialect of G-code generated.
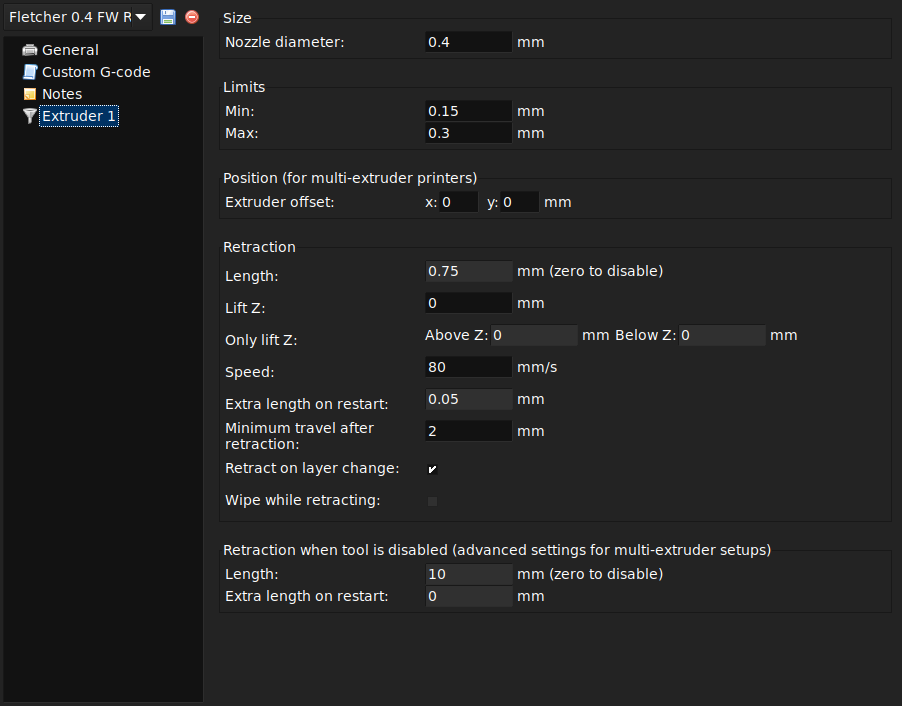
Printer Settings: Extruder
Nozzle diameter was defined in the wizard (see p.).
Unless the material being extruded has a very high viscosity it may ooze between extrusions due to gravity. This can be remedied by actively retracting the filament between extrusions. Setting the Length parameter to a positive value will cause the filament to be reversed by that many millimeters before travel. The retraction will then be compensated for by the same amount after the travel move, before starting the new extrusion path.
A value of between 1 and 2mm is usually recommended. Bowden extruders may need up to 4 or 5mm due to the hysteresis introduced by the tube. Setting the Lift Z parameter to a positive value will raise the entire extruder on the Z axis by that many millimeters during each travel. This can be useful to ensure the nozzle will not catch on any already laid filament, however it is usually not necessary and will slow the print speed. A value of 0.1mm is usually sufficient.
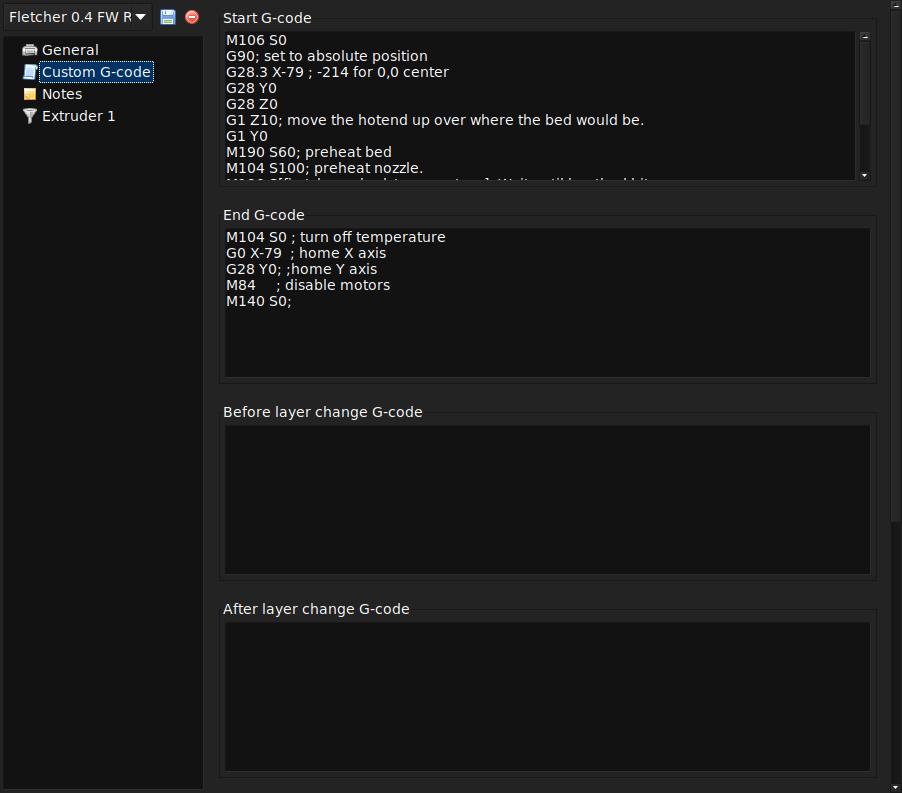
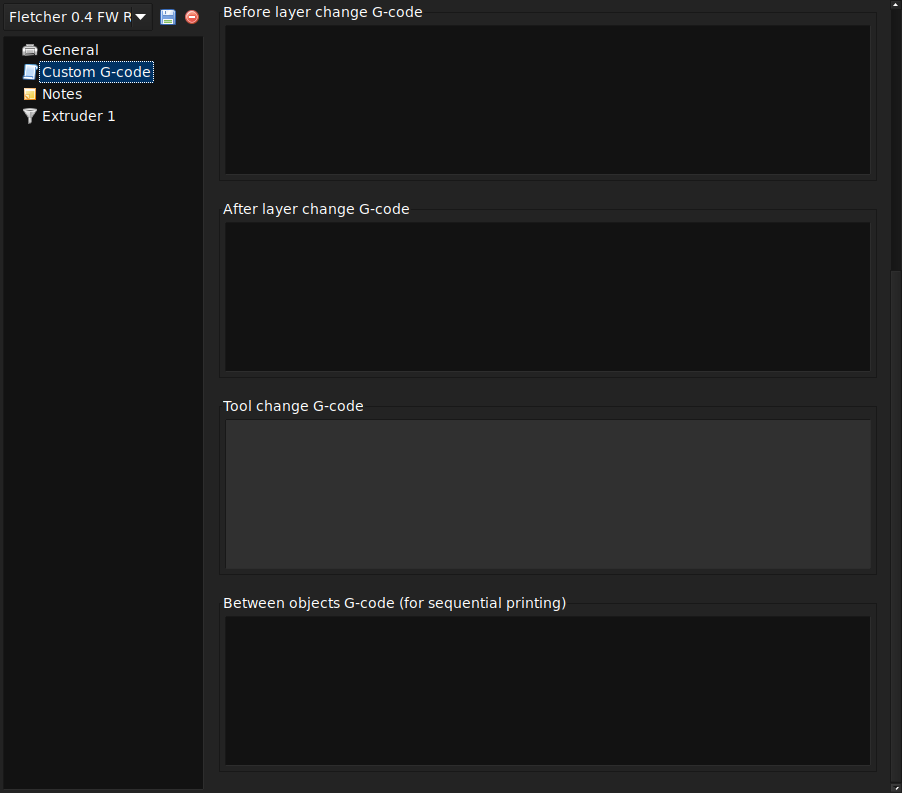
Custom G-code commands can be run before a print starts and after a print finishes.
Placeholders can be inserted in the G-code commands1. For example [next_extruder] would return the index of the next extruder.
The RepRap wiki is a good resource to learn about the variety of G-codes available: http://reprap.org/wiki/G-code.
Note: Be sure to check that a given G-code is valid for your firmware.
The codes specified in Start G-code are inserted at the beginning of the output file, directly after the temperature control commands for extruder and bed. Note that if temperature control commands are specified (M104 and M190) then these will replace the temperature G-codes introduced by the Filament settings.
Some common G-codes to use before the print starts are:
Some common G-codes to use after the print ends are:
M104 S0 - Sets the extruder temperature to zero.
M140 S0 - Sets the heated bed temperature to zero.
G28 X0 - Home the X axis.
M84 - Disables the motors.
https://github.com/alexrj/Slic3r/wiki/FAQ#what-placeholders-can-i-use-in-custom-g-code↩