 Slic3r Manual
Slic3r Manual
Slic3r Manual
Slic3r gives the ability to adjust the layer height along the Z axis. That is, parts of the model could be printed with a coarse layer height, for example vertical sections, and other parts could be printed with a finer layer height, for example sloping gradients where layering appears more pronounced.
The layer thickness distribution can be influenced by:
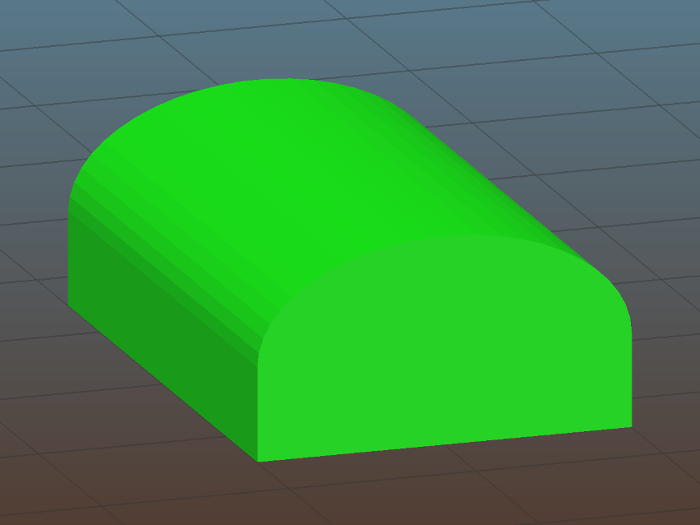
Example model highlighting use case for variable layer heights.
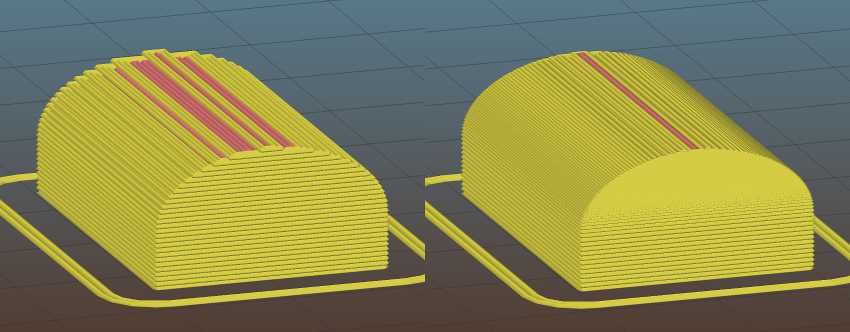
Static coarse layer height (left) and adaptive heights generated by Slic3r (right).
Maintaining a good balance between printing time and quality is a fundamental trade-off problem for 3D printing.
If the Use adaptive slicing option is enabled, Slic3r automatically computes the individual thickness of each layer based on the angle of the surface. Technical details are provided in a paper 1.
The Adaptive quality option adjusts the overall quality between 0% - thickest printable layers over the entire object to 100% - thinnest possible layers.
The Z full steps/mm parameter is always respected by the adaptive slicing process, also the Combine infill logic is not affected. Example: if Combine infill is set to 3, Slic3r will combine up to 3 infill layers, even if those layers are of different thickness. The number of combined layers will vary along the Z axis, depending on the local thickness of layers.
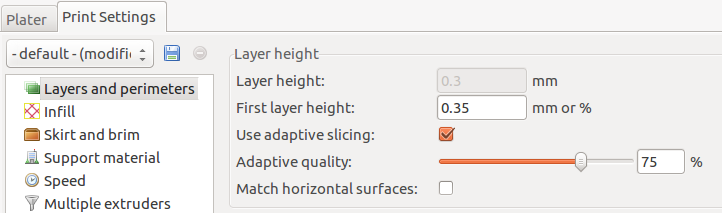
Activate adaptive slicing and set desired quality in the Print settings dialog.
Upper and lower limits for the layer thickness are set per extruder in the Printer Settings tab. Slic3r automatically uses the values for all extruders which are used for a particular print. If for example only one extruder is used from a dual nozzle printer, the limits of the second extruder won't reduce the maximum layer thickness.
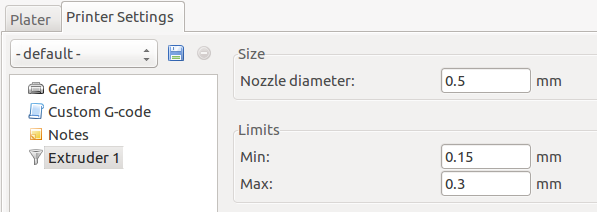
Set the minimum / maximum possible layer thickness for each extruder in the Printer settings.
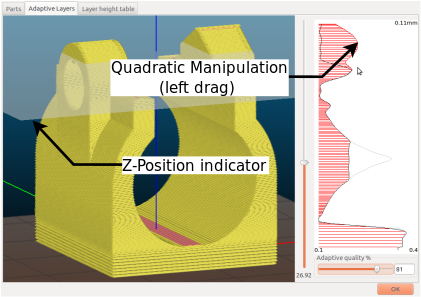
A tool to interactively refine the layer heights of an object is available by double clicking an object in the 3D tab or taking the Layer heights... short-cut on the Plater. This opens Adaptive Layers tab in the Settings dialogue, where the layer thickness curve can be modified for each individual model on the plater.
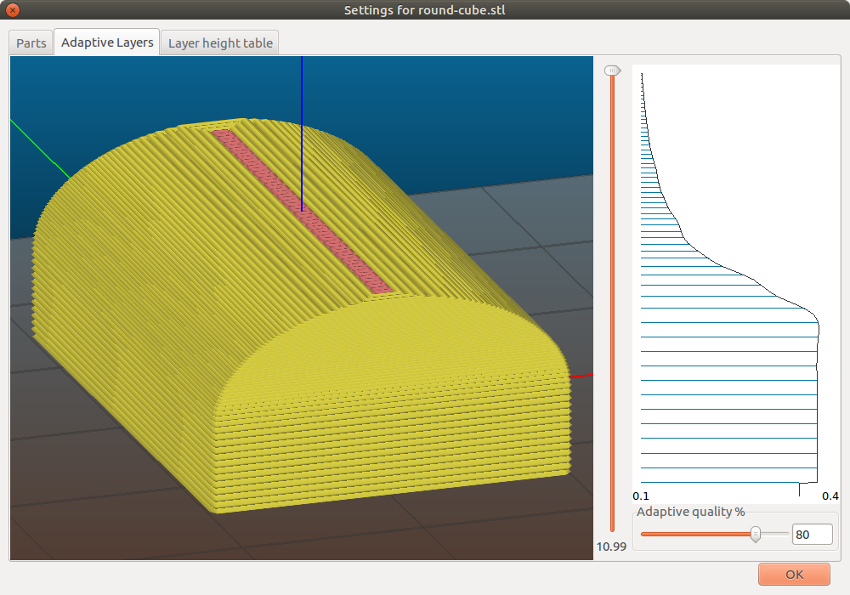
Variable layer height control curve.
Use the mouse to drag the layer height curve:

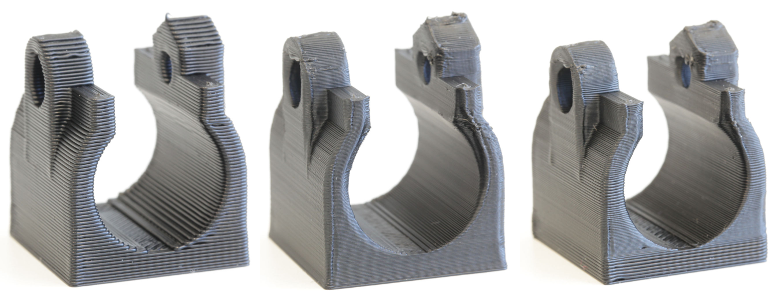
The same object printed with static thick layers (left), static thin layers (center) and adaptive layers (right).
The layer height table allows to define a layer height for a particular range along the Z axis, given in millimeters. The values from this table will override both, the default and adaptively generated layer heights, but not the interactively modified curve in the Adaptive layers tab.
In this example the steepest base of the model is printed at 0.4mm, the steeper parts of the roof are printed at 0.2mm, and the less steep at 0.15mm. Note that each range divides exactly by the given layer height so there are no "gaps" between sections.

User defined table of layer heights certain ranges of the object.

Resulting G-Code from the settings in the table shown above.